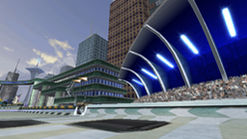
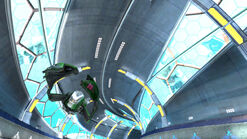
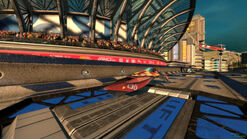
Vineta K (also known as The K) is a racetrack located on the man-made Hawaiian island of Makana. It was first introduced in Wipeout Pure, and reappeared in Wipeout HD.
Description[]
Wipeout Pure[]
4.45km of tungsten-alum Hi-Bounce™ snakes past prime ocean front real estate. Beware of falling guano.
Overview[]
Vineta K is situated at a beachside resort and marina on Makana Island. Being one of the easiest track in terms of complexity, this is a good track for beginner pilots to get accustomed to their crafts and to give the crowd a good show as the track winds around the beachfront properties, along the quays of the island, and even beneath the sea in the PlasmaShield aquatic tunnels.
Landmarks[]
Vineta Stadium[]
Makana's main G-Ball stadium is also used as a good vantage point of the main straight by fans. Situated directly on the finish line, spectators encounter close hand the speed the craft run.
Atlanta Strip[]
After extensive rebuilding in the 2190s, Atlanta Strip is the plac to be seen on the K. Overlooking the hi-velocity 'Rip-Curl Sweep' section of the course is the Hobart & Thackery Casino-Motel, with the Boines Tower thrusting in the background.
Ignition Spire[]
This spire signifies the start of the aquatic sections of the track. But to go past it, pilots need to negociate a steep downhill section called The K Dive into the sea then negociate a sharp left. Even the best pilots find some difficulty in this section.
East Bay[]
This section has become a feature of the circuit, as pilots must readjust to the Makana sun whist maintaining control over their ship. It's also a good area for pilots to gather speed or eliminate rivals before plunging back into the second section of tunnels. It is also nicknamed Van's Miami, not just after Dutch actor Cotias Van Rhine who relocated here after his 2160 trial in Florida, but also the faux art-deco architecture which adorns the trackside.
Agton Research Dome[]
Originally called the McHenry Dome, it is a major icon of the K as well as a marvel in architecture. Built with a geodestic design, this dome successfully holds back the pressures of the bay. If there is too much weight, the dome is connected to the lighting system which warns of over-tonnage by changing color.
Track Guide[]
From the start directly ahead is a shallow right-left chicane. Try to take this as straight as possible, almost brushing the right-hand apex as you do. This will bring you onto a speed pad on the left hand side. An 80 degree left awaits a little way up. The decline in this corner will help to bring your craft round, so you may not have to turn as sharply as you may think. Nevertheless, slight use of the airbrakes may be required. Try not to pick up too much speed as you go into the underwater tunnel. There are two speed pads side by side near the entrance, but if you're not confident with your airbrake usage, try to aim between them.
At the bottom is a shallow right immediately followed by a very sharp left. It may sound surprising, but try to slightly overturn the right hander, then slam on the left airbrake and swing the back end of the craft round the left hander. If you find yourself drifting too far over, use a quick left sideshift to bring yourself back centre. If you can manage to get over to the inside of the left hand corner, there is a speed pad waiting. Hit the speed pads on the edge of the ramp and be ready for the long shallow left on the other side.
As you near the tunnel exit, the track will slide round to the right. Move over to the left hand side of the track to catch a speed pad as you come out. Going down the straight, stay over to the left to pick up another pad before moving over to the right hand side to hit a third as you go into the second tunnel. The next left turn is quite deceiving, it begins fairly shallow but sharpens nearer the end where there are two speed pads waiting for you. You may need to tap the left airbrake slightly as it sharpens. Hit the pads and swing the craft round the next right and over the ramp.
There is another fairly shallow left waiting as you land. There is another speed pad on the left if you can control the turn. Once you are out of the tunnel, move over to the right to pick up the last speed pad before taking the final shallow left and over the finish. Use your speed boost to take you over the line, it will also give you a small advantage on the next lap.
Gallery[]
| Racetracks in Wipeout Pure | |||||
|---|---|---|---|---|---|
| Base Game | Alpha League | Vineta K | Modesto Heights | Chenghou Project | Blue Ridge |
| Beta League | Sinucit | Citta Nuova | Sebenco Climb | Sol 2 | |
| Classic League | Karbonis | Sagarmatha | Manor Top | Mandrashee | |
| Zone Tracks | Pro Tozo | Mallavol | Coridon 12 | Syncopia | |
| DLC | Gamma League | Exostra Run | Ubermall | Staten Park | Sebenco Peak |
| Delta League | Koltiwa | Anulpha Pass | Khara Descent | Iridia | |
| Classic League 2 | Altima VII | Odessa Keys | Porto Kora | Vohl Square | |
| Omega League (EU only) |
Burgertown | Cardcity Run | Paris Hair | 123Klan | |
| Racetracks in Wipeout HD | |||||
|---|---|---|---|---|---|
| HD (Base Game) |
Vineta K | Anulpha Pass | Moa Therma | Chenghou Project | |
| Metropia | Sebenco Climb | Ubermall | Sol 2 | ||
| Fury (Expansion) |
Regular | Talon's Junction | The Amphiseum | Modesto Heights | Tech De Ra |
| Zone | Pro Tozo | Mallavol | Corridon 12 | Syncopia | |


